Spring的依赖注入过程
测试环境配置
个人测试环境目录结构

测试环境依赖导入
1 | |
测试结构
domain层
Test01类
@Component 代表该类被交由Spring容器管理
1 | |
Test02类
@Component 代表该类被交由Spring容器管理
@AutoWired 会从Spring容器中寻找匹配的bean来注入
1 | |
AppConfig配置类
@ComponentScan 配置组件扫描的基础包路径,Spring 将在这些包中查找标有 @Component 注解的类。
@Configuration 表明该类是一个配置类
1 | |
Test 测试类
1 | |
具体执行步骤
程序会从Test测试类开始
1 | |
首先会创建一个AnnotationConfigApplicationContext对象 ,这个类是ApplicationContex这个接口的实现类
ApplicationContext继承了BeanFactory,这个BeanFactory才是真正去制造bean的,之后的ApplicationContext、AnnotationConfigApplicationContext都是在它的基础上提供了更多的功能,如事件发布、国际化、AOP 等,使得它更适合用于企业级应用程序的开发。
AnnotationConfigApplicationContext会根据传入参数的AppConfig.class中的@ ComponentScan这个注解中的包路径去寻找是否带@Component注解的类,以及获取类的所有属性以及方法来确认是否有@AutoWired注解或其他注解 ()
1
2
3
4
@ComponentScan("com.kangkang")
@Configuration
public class AppConfig {
}
这个时候就会根据@Component注解往Spring容器中注入两个bean,(一个Test01一个Test02) 而Test02中的@AutoWired注解会从容器中得到之前注入的Test01bean,注入到Test02中的name属性中
1
2
@Autowired
private Test1 name;在容器中查找 Bean 定义: Spring 容器会根据传入的类型
Test2.class在容器中查找对应的 Bean 定义。这可以是通过注解标记的类(例如@Component、@Service等),也可以是通过 Java 配置类中的@Bean方法定义的。实例化 Bean: 如果找到了匹配的 Bean 定义,Spring 会实例化一个
Test2类型的对象。这可能涉及到构造函数的调用,依赖项的注入等。注入依赖项: 如果
Test2类中有其他依赖项(通过构造函数、字段或方法注入),Spring 会尝试解析这些依赖项并递归地注入它们。返回 Bean 实例: 最终,
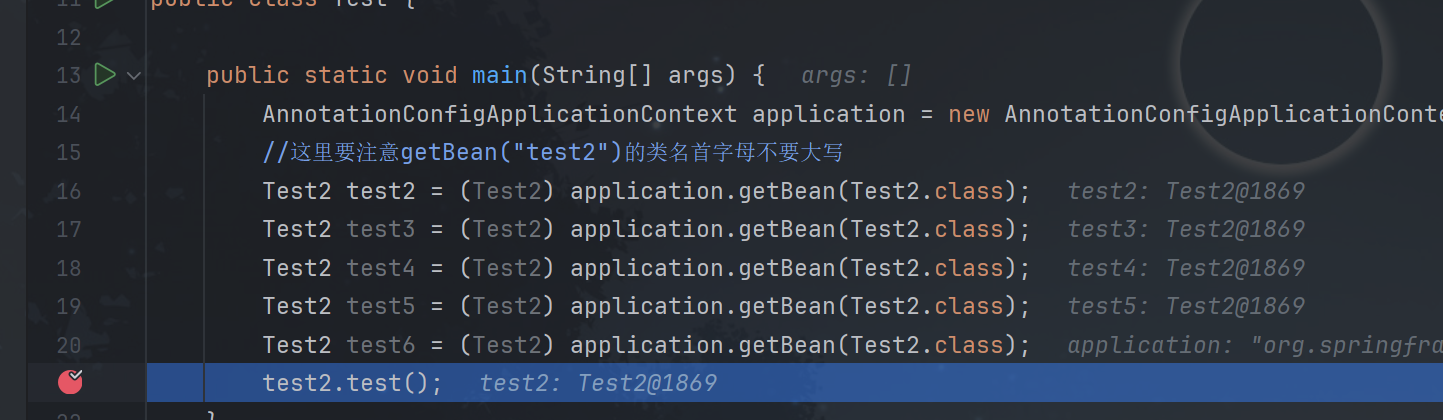
getBean(Test2.class)方法会返回类型为Test2的 bean 实例。1
2Test2 test4 = (Test2) application.getBean(Test2.class);
test2.test();注意Spring中默认模式是单例的也就是说每个bean都是唯一的,可以通过debug一下来演示,可以看见每个对象都是一样的 Test2@1869
最后通过Test2bean对象成功调用Test 输出Test01的对象
1
Spring自动注入:com.kangkang.domain.Test1@8458f04